For parcel, bar code or other labels, you determine the data, order and format for the label to be provided in this editor. In order to open the label editor, proceed as follows:
-
Open either the “Contacts” module or the “Article” module.
-
Highlight at least one file and choose one of three print commands:
“Print/Label - Article label” (Article)
“Print/Label - Pallet label” (Article)
“Print/Contacts - Mailing label” (Contacts)
-
In the print setup window, you activate the field “Print preview” and confirm with the pressed key combination Ctrl + ⇧ with “OK”. Here the window of the label editor appears.

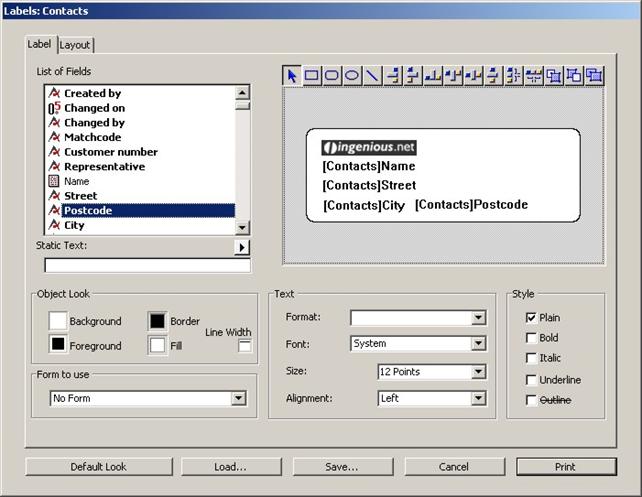
View of the label editor
Depending on which print command you have chosen, you are now in the corresponding label.
Printing the company logo and/or picture on a label
A picture, such as the company logo for example, can only be inserted with the clipboard in the label and be printed. This means that the picture must be opened in paint at first and copied before you can simply insert it with the label editor in the label.
Practice creating labels
-
Open the label editor and remove (if necessary) the already available entries from the preview of the current labels with the help of the “Delete” key. In this exercise, a mailing label should be provided.
-
Pull the necessary data fields (name and address data) from the field list into the preview area.
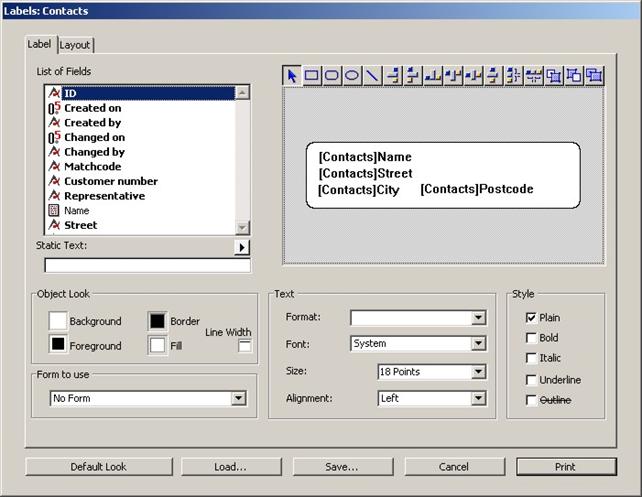
By clicking the fields located in the preview, you can change your position with the mouse and optionally change the size. Also the display (style), font size (text) as well as the font (text) and font color (object display) can be individually edited with the help of the corresponding setup areas.
-
Edit the label with the available tool bar.

-
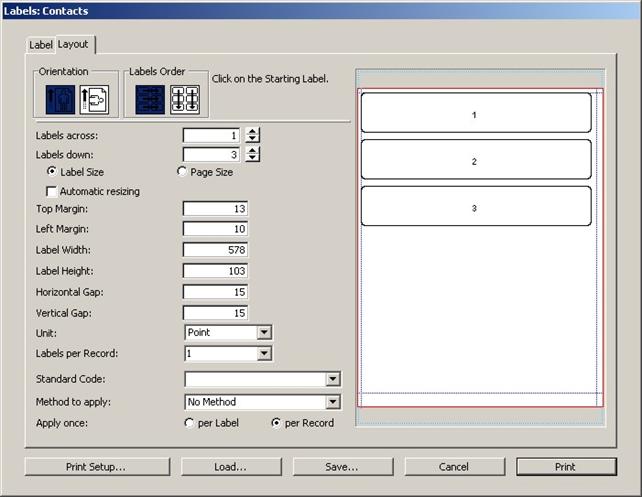
In the tab, switch to “Size” in order to meet other settings for the printing.
-
When you have finished your label, you click on the button “Save…” to save the label. Switch to folder “Label”, there you choose the folder “Contacts” and save there your label as “ParcelLabel2”.
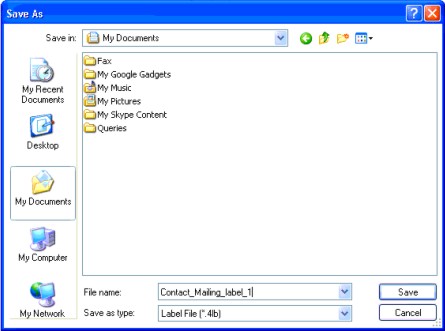
Standard dialogue window for saving
The label editor is provided by database engine 4D. Further information and tutorials can be found at the 4D documentation center:
http://doc.4d.com/4Dv12/4D/12.4/Label-editor.200-1015817.en.html